Unreal Engine Blueprints for Beginners: Learn With an AI and Comment Boxes
Unreal Engine Blueprints for beginners: ask an AI for a small first Blueprint, a sliding door, and have it add comment boxes that explain every part of the graph.

The easiest way to start with Unreal Engine Blueprints is to ask an AI for a small first Blueprint and have it explain every part in plain words. The trick is one sentence in the request: add comment boxes around each part of the graph, explaining what it does. You are not just asking for a door. You are asking the AI to teach you while it builds.
In this walkthrough, Ultimate Engine CoPilot builds a sliding door from a request that starts with “I am new to Blueprints”. You get the request, how to read the graph it made and a few ways to learn faster.
What a Blueprint is
A Blueprint is a way to build game logic without writing code. Instead of typing, you place nodes and connect them with wires. An event node starts the logic, and the wires carry it from one step to the next.
This Blueprint is a door. It has two pillars, a door panel and an invisible sphere around it. The sphere is the part that notices when the player comes close.
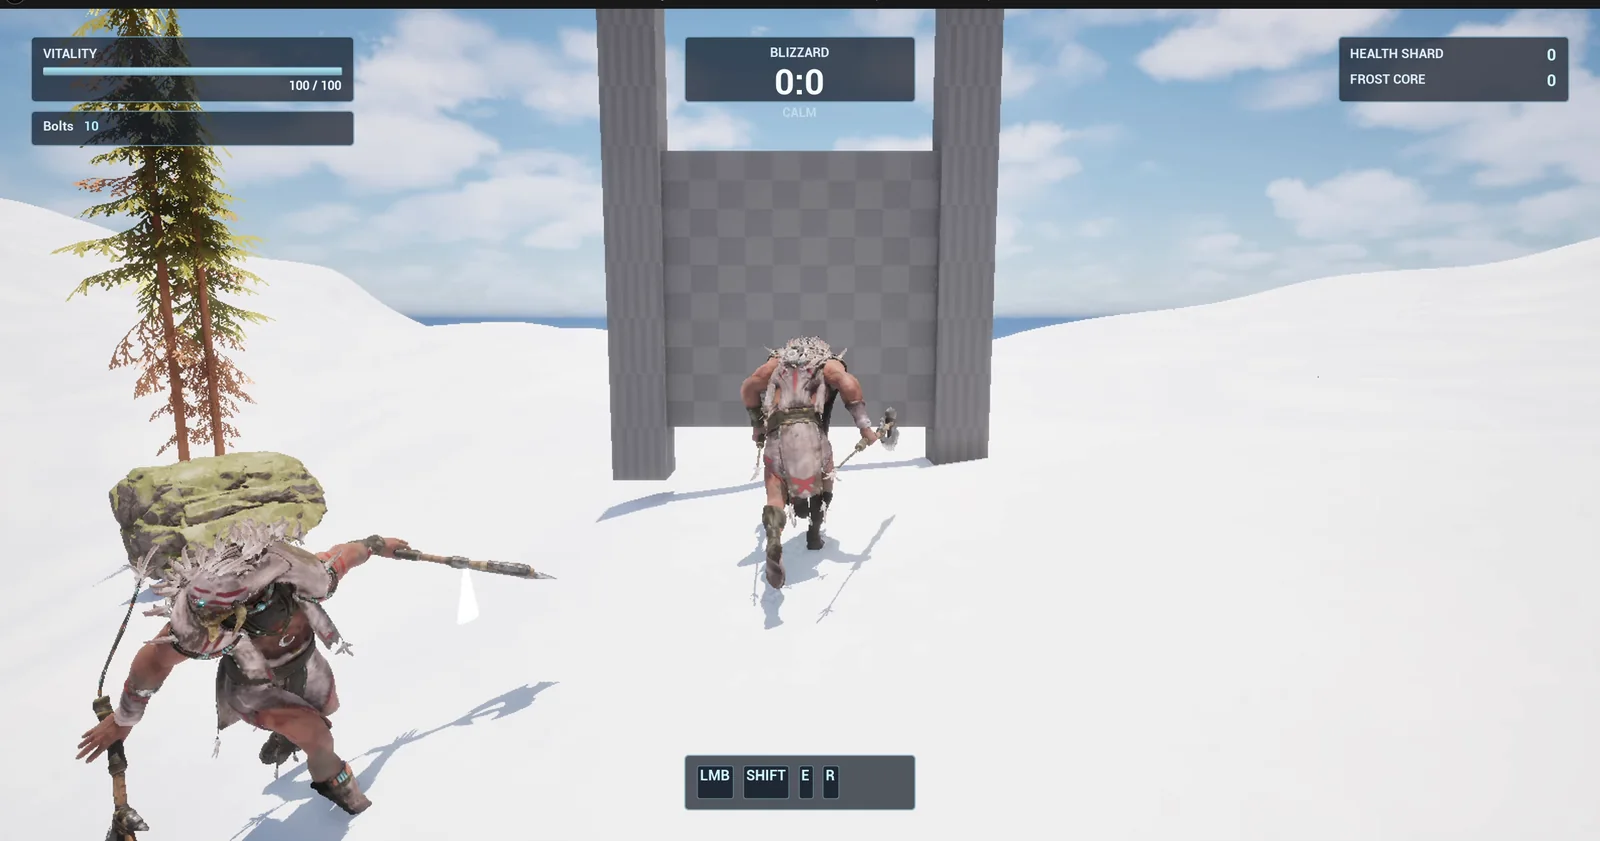
The finished door: two pillars and a panel that slides up when you come close.
The request
This is the request in short form:
I am new to Blueprints. Make me a simple door as my first Blueprint. Create BP_SlidingDoor in /Game/Series/EP10_FirstBlueprint using engine basic shapes: two stone pillars and a wide door panel between them. When the player walks within 300 units, the door panel slides up 250 units in 1 second, and when the player walks away it slides back down. Add a Blueprint comment box around each part of the graph explaining in plain words what it does, so a beginner can read it. Place the door on the snow in front of the player start, then play test it by walking up to it and away, and fix anything that does not work.The last instruction is the trick for learning. The comment boxes turn the graph into a lesson.
How the AI builds it
The AI starts by looking at your level and the Blueprint tools. Then it creates the Blueprint in its own folder, and the door appears in the Content Browser. Everything is made from engine basic shapes, so there is nothing to import.
Then it builds the graph. It saves the closed position when the game starts. When something enters the sphere, it checks that it is the player and plays a timeline. A timeline is a curve over time, here from 0 to 250 over one second, and the panel follows it up. When the player leaves, the timeline plays backward.
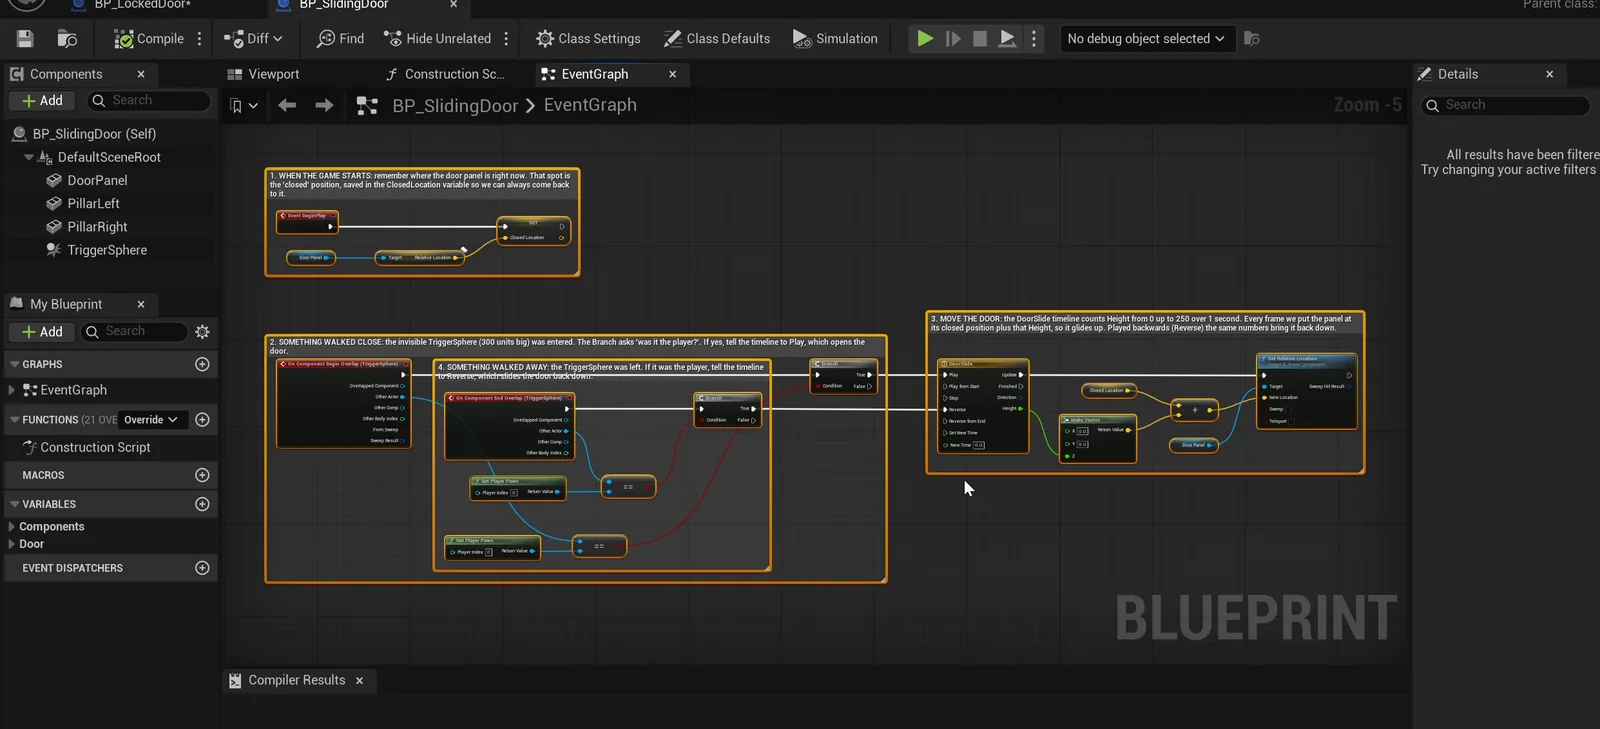
The graph the AI made. Each yellow box is a comment that explains its part.
The play test
The AI tests the door in the running game:
- The door stays closed while the player is 600 units away.
- When the player gets in range, the panel ends 250 units higher.
- When the player walks away, it returns.
- Half a second after entering, the panel is about 148 units up, so it slides and does not snap.
- It is fully open at one second and fully closed one second after leaving.
The report
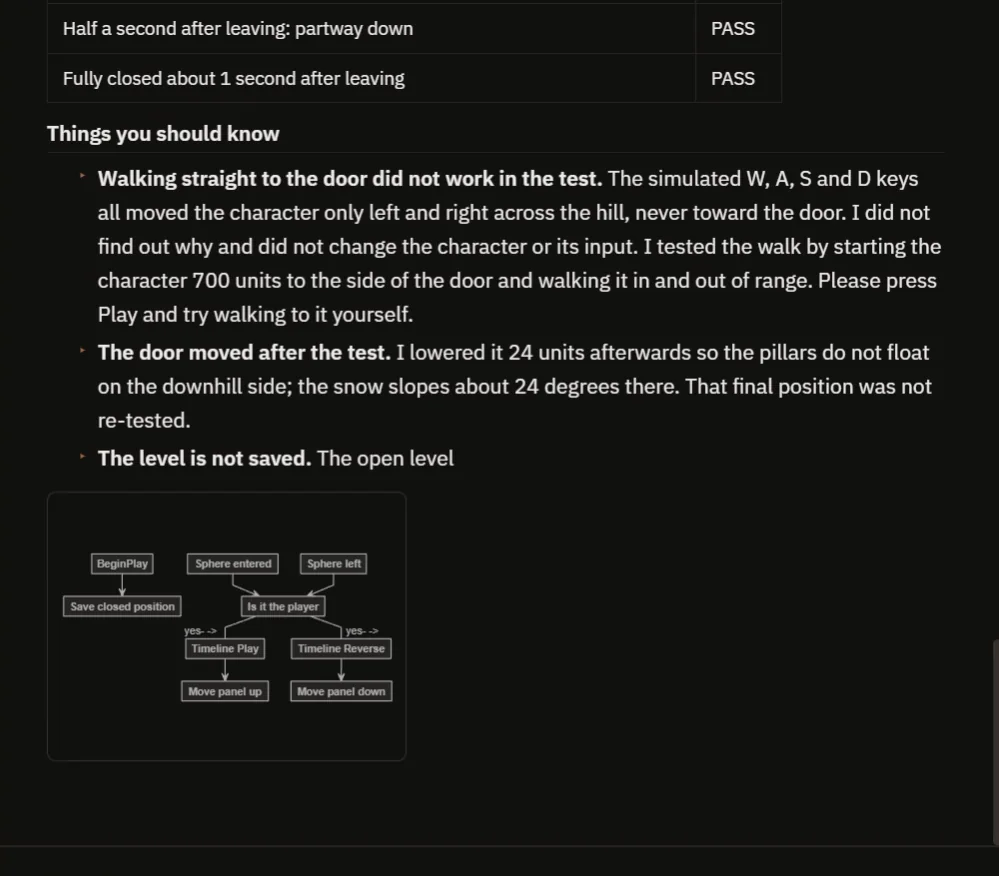
The report explains the parts, draws the flow and says what it could not do.
The report explains the parts: the door panel, the trigger sphere and a variable that remembers the closed position. It even draws the flow in a small diagram. And it tells you what it could not do:
- The simulated movement keys moved the character sideways and not toward the door, so it tested by starting the character 700 units to the side and walking it in and out of range.
- It moved the door down a little afterwards, so the pillars do not float on the slope, and it says that final position was not re-tested.
- The pillars are plain white.
- The level is not saved.
That is the kind of detail you want from a helper.
How to read the graph
Open the graph and read the comment boxes from left to right:
- At the top, a box says: when the game starts, remember where the door is closed.
- Below it are the boxes for “something walked inside” and “something walked away”. Each one checks that it was the player, then plays or reverses the timeline.
- On the right, the box for moving the door. The timeline value is added to the closed position, every frame.
Read the boxes in that order and you understand the whole door.
Reading a graph is like following a recipe
- An event is the line that says when to start. In this door, the events are the game starting, something walking into the sphere and something walking out. Each event has a white wire leaving it. Follow that wire, and every node it touches is one step.
- Colored wires carry values in, such as which actor just walked in.
- The comment boxes are the headings of the recipe.
- A variable is a labeled jar that remembers a value. Here, the closed position goes into a variable when the game starts, so the door always knows where home is.
- A timeline is a small clock with a curve. While it plays, it hands out a number that changes over time, here from 0 to 250 in one second. The graph adds that number to home, every frame. Play it forward and the door rises. Reverse it and the door comes down.
Ideas to try next
- A door that slides sideways instead of up.
- A slower opening, so it feels heavy.
- A door that stays open for three seconds after you walk away, with a comment box for every new part it builds.
- A second door that is twice as tall. See how it changes the numbers.
Then copy the original request and change one number. Make the distance bigger or the height smaller, and press Play to see what happens.
Four tips for learning Blueprints with an AI
- Ask for a small first project.
- Ask for comment boxes.
- Read the graph one box at a time.
- Change one number, then play, to see what it does.
When you are ready to ask for bigger things, see How to Write AI Prompts for Unreal Engine.
Frequently asked questions
What are Blueprints in Unreal Engine?
Blueprints are Unreal Engine’s visual scripting system. You build game logic by placing nodes and connecting them with wires instead of typing code.
How do I learn Blueprints as a beginner?
Start with one small project, such as a door, and read how it is built. Asking an AI to add comment boxes to the graph gives you a plain-words explanation of every part right inside the editor.
How does a sliding door Blueprint work?
A trigger sphere detects the player, a timeline from 0 to 250 plays over one second and the door panel moves by that amount from its closed position. When the player leaves, the timeline plays backward.
Try it in your project
See what Ultimate Engine CoPilot can build on the product page, or get it on Fab.
Related builds: Generate a Blueprint From One Sentence and the Unreal Engine pressure plate, another door-style puzzle.